1.Introduction
There Is No Perfect Way to Sand a Blade
I’ve been playing table tennis for about 40 years. Looking back, I realized something interesting: nobody ever really taught me how to sand a racket.
Like many players, I learned through trial and error. Some of my old rackets were sanded so badly that the changes could never be undone.
After many years, I’ve come to one conclusion: there is no single “correct” way to sand a blade.
Every player has different hands, grip pressure, and playing styles. That’s why, in this article, I’ll share the most important lessons and mistakes I’ve learned over the past 40 years.
2.How to Sand a Table Tennis Racket Grip
After decades of trial and error, I’ve reached one conclusion:
The biggest mistake is trying to finish everything at once.
A blade should be adjusted little by little while actually playing. Your sweat marks and pain points will naturally show you where to sand.
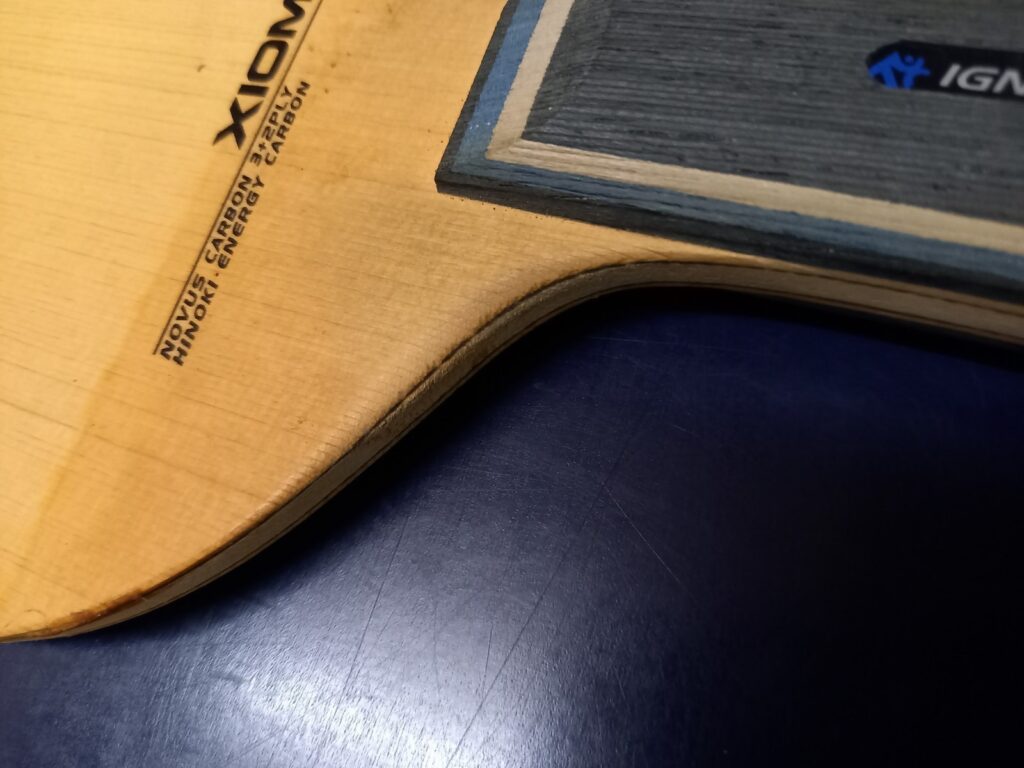
(1)Shakehand Blades
Most shakehand players can use their blades without major sanding. In many cases, only small adjustments are needed.
Recommended Process
- Play with the blade first before sanding.
- Check where your hand feels pain or discomfort.
- Lightly sand only those areas.
- Repeat the process gradually.
The key is to sand less than you think you need.
I’ve ruined more blades from over-sanding at home than I’d like to admit.
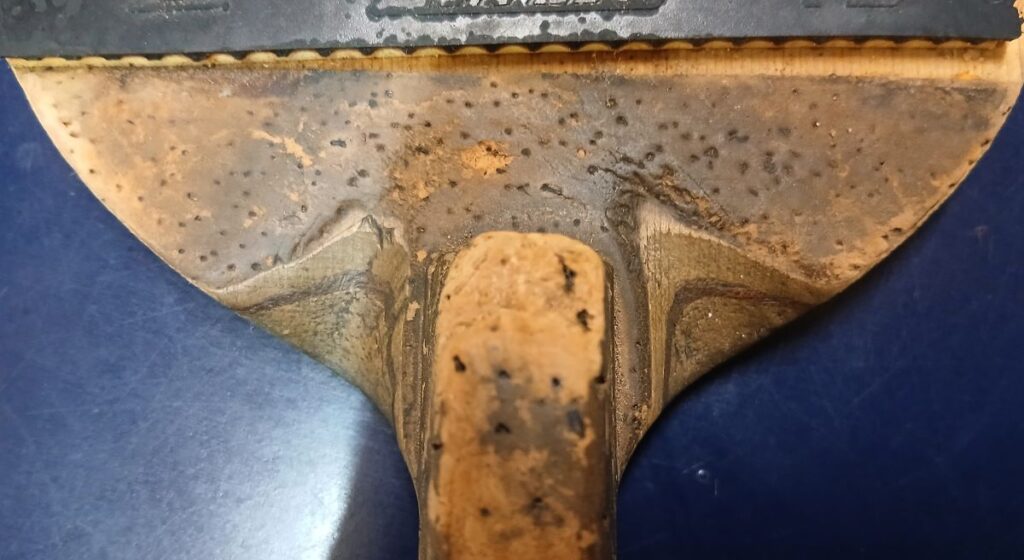
(2)Penhold Blades
Penhold blades are completely different.
In 40 years of playing, I’ve never seen a penholder use a completely unsanded blade.
Without sanding, the edges dig into your fingers and palm, making it difficult to swing naturally.
Basic Process
- Start by lightly rounding the sharp edges near the thumb and index finger.
- Play with the blade.
- Check sweat marks and painful spots.
- Sand only those specific areas.
- Repeat slowly over time.
It’s usually better to under-sand than over-sand.
Recommended Sandpaper Grits
120–180 grit for shaping
400–600 grit for finishing and smoothing
Personally, I sand my blades quite deeply to create more space for my reverse backhand (RPB) grip.
Especially around the index finger area, I modify the grip aggressively to achieve a deeper and more stable hold.

3.Summary
Most players who seriously sand their blades are probably penholders.
So, let me finish with the most important lesson I’ve learned over the past 40 years.
【The Golden Rule】
If you try to finish your sanding in one session, you will probably fail.
Sand slowly. Test often. Repeat over time.
Late-night sanding is especially dangerous for some reason.
Take your time and create a grip that truly fits your hand.
Watch my 3-day grip modification process below.
Watch the unboxing, rubber installation, and initial racket setup below.
I hope my experience helps you create a grip that fits your hand perfectly.


-320x180.jpg)


.jpg)
コメント